Low to High Quality/Resolution Photo/Image in adobe Photoshop [Hindi]

” upload_time=”2016-10-28T10:04:48.000Z” description=”In this video you will see about how to convert a low resolution Photo in to High Resolution and good quality image. remove pixels from a photo during Big/large”]
In this video you will see about how to convert a low resolution Photo in to High Resolution and good quality image. remove pixels from a photo during Big/large size use.

Photo Credit :
https://pixabay.com/photo-748932/

visit at :
www.sanjayphotoworld.com
Facebook page:
www.facebook.com/sanjayphotoworld
Twitter
@skswami24

Please Comment your feedback about video in Comment box. बेसिक

Dispersion Effect | Photoshop Tutorial


In this photoshop tutorial you will learn how to create a dispersion effect & disintegration effect in photoshop cs6. These Dispersion effect, Disintegration effect, Pixel explosion effect, Smoke dispersion effect & splatter effect are most usually and very popular in photoshop. Follow these easy steps to easily make dispersion effect in photoshop.

SUBSCRIBE for more Free Photoshop Tutorials ► https://goo.gl/9pAjk0

Previous Photoshop Tutorial ► https://goo.gl/mwfyCr

Checkout more Photoshop Tutorials ► https://goo.gl/GrdXvm

Download PSD File ► https://goo.gl/YGn1mm
Download Free Stock Image ► https://goo.gl/qLxsDu
Download Smoke Brushes by Brusheezy ► https://goo.gl/N4tSfL

Add me as a Friend –
Facebook ► https://www.facebook.com/webflippy
Twitter ► https://twitter.com/webflippy
Instagram ► https://instagram.com/webflippy
Google+ ► https://plus.google.com/+WebflippyOfficialPage
Pinterest ► https://www.pinterest.com/webflippy

Click the SUBSCRIBE button to see all the latest & new photoshop tutorials & photo effects.

Stay up to date with Photoshop Tutorials by Webflippy, Thanks for Watching.

The Amazing Power of Frequency Separation Retouching in Photoshop


I Guarantee I Can Teach You to Master Photoshop. Learn How: https://phlearn.com/aaronwillteachyou

What is Frequency Separation?

Frequency separation helps make retouching a portrait easier in Photoshop. Frequency separation works because it allows you to separate the texture of an image from the tone and color. When retouching you can focus on just the texture or the skin beneath it.

Download our free frequency separation action here: https://phlearn.com/amazing-power-frequency-separation-retouching-photoshop

It sounds quite complex but in practice it is quite simple. If you want to work with texture, choose the high frequency layer, if you want to work with skin choose the low frequency layer.

Getting Started with Frequency Separation

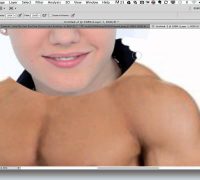
To get your image set up for frequency separation you will have to make 2 copies of your background layer. If you are not starting from the beginning, add a Stamp Visible layer over all layers by typing CTRL+ALT+OPTN+E. One of these copies will be for your low frequency (skin) and one will be for your high frequency (texture).

First apply a Gaussian Blur to the lower (low frequency) layer. Choose a radius that blurs out the skin texture, but don’t go too far as to make the face unrecognizable.

Next choose your high frequency layer and go to Image, Apply Image. Here you will want to se the Layer: to the low frequency layer. For blending choose Subtract and for Scale:2, Offset:128. These will be your settings every time, no need to change them.

Now you should have one layer with a blur (low frequency) and a layer above it that looks mostly gray (high frequency). Select the high frequency layer and change the blending mode to “Linear Light”.

Your image should now look identical to the image before you started the process.

Correcting Underlying Color

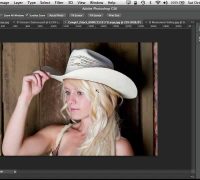
To correct the underlying color (skin) choose an area with the lasso tool. I suggest feathering the selection to make it look more realistic. Use Q for Quick Mask as a quick way to see what your selection looks like. After you have made your selection choose the low frequency (blurred) layer and apply a Gaussian Blur in the selection. Choose a radius high enough to blend the tones together.

Repeat this process over different areas of the portrait to smooth the skin tones. Because the texture is on a different layer, it should stay in tact during this entire process.

Correcting Texture

If you need to correct texture, we recommend waiting until after you do the tone. Select the high frequency layer and choose the Clone Stamp Tool. In the Clone Stamp Tool settings be sure to hit Sample: Current Layer. This will make sure you are just using the texture and not sampling anything else. Then on your high frequency layer sample good skin texture using ALT and then paint over “bad” skin texture. This will work very well for stray hairs, acne, wrinkles and other small blemishes.

Free Frequency Separation Action

If you want to skip making your own frequency separation layers be sure to download our Frequency Separation Retouching Photoshop Action. It is designed for use in Photoshop CC.

VISIT PHLEARN.COM FOR MORE FREE TUTORIALS

Homepage

SUBSCRIBE TO OUR CHANNEL FOR MORE FREE TIPS AND TRICKS
http://www.youtube.com/subscription_center?add_user=phlearnllc

GET FREE TUTORIALS IN YOUR EMAIL + DISCOUNTS ON OUR PRO TUTORIALS!
https://phlearn.com/mail

BUY THE TABLET AARON USES! https://phlearn.com/tablet

LET’S BE FRIENDS!
Instagram ► https://www.instagram.com/phlearn/
Facebook ► https://facebook.com/phlearn
Twitter ► https://twitter.com/phlearn
Google+ ► https://plus.google.com/116791098059215639405
Phlearn ► https://phlearn.com

————————————————————————————————————
Download the Frequency Separation Brush here: https://phlearn.com/amazing-power-frequency-separation-retouching-photoshop

Photoshop Tutorial: How to Make a PORTRAIT made only of TEXT!


Photoshop tutorial showing how to create a portrait made of editable text layers.

Lincoln face file:
http://bltvfiles.com/files/Lincoln.gif

Revised tutorial:

Subscribe to Blue Lightning TV!:
http://goo.gl/HEpuJ4

Website:
http://www.bluelightningtv.com/

For a limited time, get 20% OFF Photoshop CC + Lightroom CC + more all together for only .99/month:
http://goo.gl/QFznn7

Become a Patron to Blue Lightning TV:
https://www.patreon.com/bluelightningtv

Facebook:
https://goo.gl/fHLJsh

Twitter:

Tutorial Photoshop CS6 – Disintegration effect


Tutorial Photoshop CS6 english – Disintegration and dispersion effect – how to create an effect that disintegrates the subject of your photo in small particles like dust,
the final result can be different each time depending on the brush you use and to the distance up to which to expand the edges of the subject,
to make this effect you have to remove and change the background to separate the person from the background

By ShadowTutorials

WEBSITE
http://shadowtutorials.altervista.org

Google+
https://plus.google.com/u/0/117360610093810112916/posts

Facebook
https://www.facebook.com/ShadowTutorials-353161314706188

in this link you can find the same brushes
http://www.brusheezy.com/brushes/1693-moon-stars-sky-dust-and-more

here you can find the same picture
https://morguefile.com/p/834451

Soundtrack: Silent Partner – Don’t Look

Photoshop Tutorial – How To Put One Picture Into Another Picture in Photoshop


Photoshop Tutorial – How To Put One Picture Into Another

In this video tutorial I show you how to place one image into another within photoshop. This is great for placing someone’s headshot onto a funny body!

If you have any questions feel free to ask them in the comment box below.

Everything I do online is hosted by Bluehost. For only .95 a month, Bluehost can help you set up and host your blog/website. Because Porter Media is a Bluehost affiliate partner, our community can use this link to receive a 50% discount off the monthly price AND A FREE DOMAIN NAME: http://goo.gl/iGVMmp

Support The Channel By Using Our Amazon Link To Shop:
http://goo.gl/slnyvG
SUBSCRIBE FOR MORE HERE:
http://goo.gl/SG9kXI

MY WEBSITE:

Welcome To Think Tutorial


——————————————————————————–­–

MY TWITTER:
https://twitter.com/#!/TechGuru77

MY FACEBOOK:
http://www.facebook.com/pages/TechGuru77/376182275747539

MY SNAPCHAT
dmporter74

MY OTHER WEBSITEs:

Get Started Here

Welcome To The YouTube Creators Hub

Support Our YouTube Creators Podcast On Patreon Here: https://goo.gl/zq3IWo

Support Our Podcast On Patreon And Get Your Channel Featured:
https://goo.gl/zq3IWo

Get A Free Audiobook Here:
http://www.audibletrial.com/creatorshub
My YouTube Setup:
Main Camera: Canon 80D – https://goo.gl/nEIttU
Webcam: Logitech C920 – https://goo.gl/WYp9ft
Main Monitor: LG UM57 – https://goo.gl/aFKRUp
Main Computer: Mac Pro – https://goo.gl/Dav2T3
Microphone: Heil PR40 – https://goo.gl/GFE7K2
Adobe Creative Cloud – https://goo.gl/8HJONR

I Use Screenflow To Record My Screencast Videos:
Get It Here: https://goo.gl/vRjuJg

Support me on Patreon to have access to a private YouTube Creators discord channel and join our community: https://goo.gl/YqtD4s

Come Hang Out With Me On Twitch:
https://www.twitch.tv/dustyporter

Disclaimers: Links in the description are typically affiliate links that let you help support the channel at no extra cost.

How to make whiteness on face in adobe Photoshop cs5 cs6 7.0 cs4 cs3 and all


Learn about make whiteness/beautifulness on face in adobe Photoshop all version .
like page on facebook – https://www.facebook.com/ilovephotographyandphotoshop बेसिक

How To Cut Anything Out in Photoshop


Clipping a subject from its background in Photoshop has to be the most common task a designer will encounter in their every day working life. The pen tool is the go-to tool for cutting most things out, but there’s some cool techniques you can use for hair, fur and other specialty subjects. So let’s crack on and look at the tools we have available to us in Photoshop.

Adobe Photoshop & Adobe Illustrator design tutorials from Chris Spooner of Spoon Graphics. Subscribe to learn how to create stunning artwork as I share my tips and tricks in video format.

Join my mailing list: http://blog.spoongraphics.co.uk/subscribe
Visit my design blog: http://blog.spoongraphics.co.uk

Follow me on Twitter: http://twitter.com/chrisspooner
Join me on Facebook: http://www.facebook.com/spoongraphics

Photoshop Tutorial | Photo Manipulation Change Background & Blending TJ


http://www.mediafire.com/download/xriatpd7tgut67r/photoshop-photo-manipulation-tutorial.psd Download PSD file

Support for our new channel for Logo Designing
https://goo.gl/YUsRS3

Follow
www.facebook.com/aruncreation

Blog
http://www.arunzdigitalphotography.blogspot.in

Music Credit
Cipher – Electronic Light by Kevin MacLeod is licensed under a Creative Commons Attribution license (https://creativecommons.org/licenses/by/4.0/)
Source: http://incompetech.com/music/royalty-free/index.html?isrc=USUAN1100844
Artist: http://incompetech.com/

How To Get Started With Photoshop CS6 – 10 Things Beginners Want to Know How To Do


In this episode of the Adobe Creative Suite Podcast, Terry White shows you How to Get Started With Adobe Photoshop CS6. See how to do the 10 things that beginners ask how to do the most including how to remove the background from an image and put it on a different background.

Follow me on Twitter: http://twitter.com/terrylwhite
Like me on Facebook: http://facebook.com/terrywhitefans
Follow me on Instagram: http://instagram.com/terryleewhite
Follow my blog: http://terrywhite.com

Tools Used to Make My Videos:
Adobe Creative Cloud: http://adobe.com/creativecloud
Screen Recording Software: http://terrywhite.com/i-use-screenflow/

Photography Equipment – What’s in My Studio: http://terrywhite.com/studio
Mobile Live Streaming Kit: http://twhite.me/scopekit